Mount of the Holy Cross: A Complete Guide to Colorado's Cross-Shaped 14er
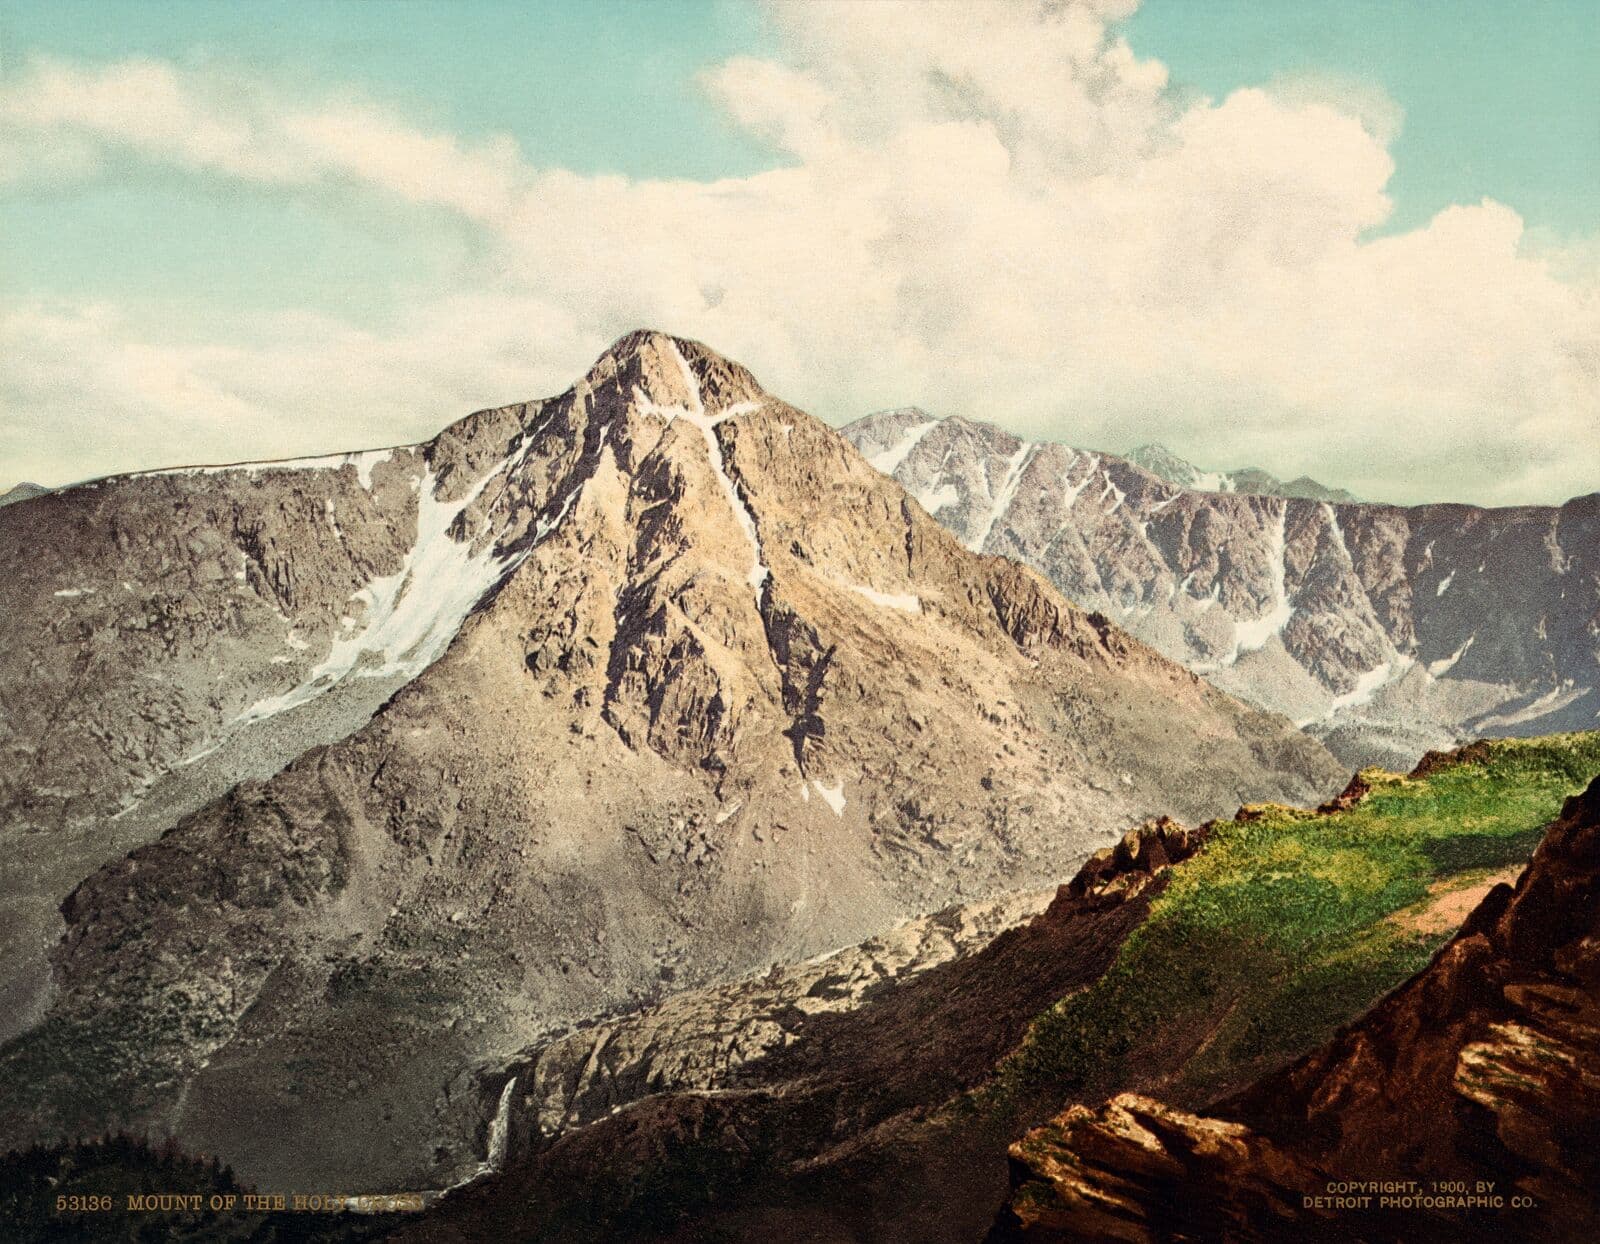
Mount of the Holy Cross is the 14er with the famous snow couloir shaped like a cross, visible from the Front Range in late spring and early summer. The peak sits at 14,005 feet in the northern Sawatch Range, deep inside the Holy Cross Wilderness southwest of Vail and Minturn. It's one of the most photographed mountains in Colorado history, and it carries a stranger cultural weight than any other 14er: William Henry Jackson's 1873 photograph of the cross-shaped snowfield helped sell Americans on the idea of the Western mountains as something sacred, and the image was a quiet contributor to the early conservation movement that eventually produced the Wilderness Act.
It's also, by most accounts, one of the hardest "easy" 14ers in the state. The standard North Ridge route is rated Class 2 and runs about 12 miles round trip with 5,600 feet of elevation gain. That number alone makes it longer and steeper than Mount Elbert. But the real story is Half Moon Pass: the route climbs over a 1,000-foot pass on the way in, drops 1,000 feet to the East Cross Creek drainage, climbs the peak, then turns around and climbs Half Moon Pass a second time on the way out, on tired legs, at the end of the day. The route is a brutal full day for the technical class.
This guide covers the North Ridge standard route, the Half Moon Pass problem, the cross couloir, and what makes Holy Cross unlike any other 14er in Colorado.
What You'll Learn
- Quick Stats
- Getting to the Trailhead
- The North Ridge Standard Route
- Half Moon Pass: The Climb-It-Twice Problem
- The Cross Couloir
- What to Pack
- Timing and Weather
- When to Climb
- What Makes Holy Cross Different
- Common Mistakes
Quick Stats
North Ridge (standard route):
- Elevation: 14,005 ft (51st highest in Colorado, lowest-ranked 14er in the Sawatch)
- Trailhead: Half Moon Trailhead, 10,320 ft
- Round Trip Distance: ~12 miles
- Elevation Gain: ~5,600 ft (note: includes the climb back over Half Moon Pass)
- Class: 2 (talus scrambling on the upper ridge, no hand climbing required)
- Time: 9-12 hours typical
- Difficulty: Strenuous (long day, big elevation gain, the pass adds significant work)
Best Season: Late June through September
Permit: None required, but Holy Cross Wilderness rules apply (group size 15, no mechanized travel)
Crowds: Moderate on summer weekends, lighter midweek; the long approach thins traffic
Getting to the Trailhead
The Half Moon Trailhead is reached via Tigiwon Road, an 8-mile gravel road that climbs out of Minturn into the Holy Cross Wilderness.
From Denver (about 2 hours):
- Take I-70 west through the Eisenhower Tunnel
- Exit at Minturn (Exit 171) about 5 miles past Vail
- Drive south through Minturn on Highway 24 for about 2 miles
- Turn right (west) on Tigiwon Road (Forest Road 707)
- Follow Tigiwon Road 8.3 miles to the Half Moon Trailhead at the end of the road
Tigiwon Road is rough gravel with washboard sections, but passenger cars can make it in dry conditions. Drive slowly. Most years it opens in late May or early June, depending on snowmelt, and closes with the first heavy snow in October or November. Check the Eagle-Holy Cross Ranger District for current status before you drive up.
Restrooms: Pit toilets at the trailhead.
Cell service: None on Tigiwon Road, none at the trailhead, none on the route.
Alternative parking: The trailhead lot holds about 25-30 vehicles. On busy summer weekends it fills by 5 AM. There's also a smaller dispersed camping area at Tigiwon Community House about a mile below the trailhead.
Camping: Many hikers camp at the trailhead the night before. Dispersed camping is allowed along Tigiwon Road. The trailhead itself has no designated camping but the parking lot tolerates car campers. Bring bear-aware food storage; this is active bear country.
The North Ridge Standard Route
The North Ridge is the standard route on Holy Cross. The route splits into four obvious sections, and you'll get to know all of them well by the end of the day.
Section 1: Trailhead to Half Moon Pass (Miles 0-1.7)
The trail leaves the parking lot and climbs immediately. It's evergreen forest, steady switchbacks, no flat ground. You'll gain about 1,000 feet in 1.7 miles to reach Half Moon Pass at 11,640 ft.
This section feels relatively easy in the dark of an alpine start. It will not feel easy on the way back.
At the pass, the trail breaks above treeline briefly and you get your first view of Mount of the Holy Cross to the south. The cross couloir is visible from here in spring and early summer. Take a picture; you've earned it, and you've barely started.
Section 2: Half Moon Pass to East Cross Creek (Miles 1.7-3.0)
From the pass, the trail drops. This is the part that breaks people psychologically. You descend roughly 1,000 feet over 1.3 miles to East Cross Creek at 10,650 ft, where the route crosses the drainage on a small log bridge.
You'll cross the creek and pass a designated backcountry camping area. Some hikers split the climb here, camping at East Cross Creek the night before and summiting the next morning. We'll cover that option below.
Refill water at the creek if you're planning to. This is the last reliable water on the route until you return.
Section 3: East Cross Creek to Treeline (Miles 3.0-4.5)
The trail begins the real climb. From the creek, you gain 2,000 feet over 1.5 miles, the steepest sustained climb of the day. Switchbacks through spruce and fir forest, then transition to krummholz, then alpine.
Treeline is around 11,800 ft. The trail emerges onto the broad north ridge with views of the upper mountain.
This section is where the day starts to feel long. You've already climbed Half Moon Pass and dropped to the creek; now you're starting the actual mountain.
Section 4: The North Ridge (Miles 4.5-6.0)
The upper route follows the broad north ridge southward to the summit. The trail is well-defined for the lower portion, then dissolves into a cairned route through talus for the upper portion.
The talus is the reason this is rated Class 2 rather than Class 1. The rocks are large, often loose, and require careful foot placement. There's no exposure, no hand climbing, no scary moves. Just slow, steady work over uneven rock for the final mile.
Around 13,800 ft, you'll cross a small false summit and see the true summit a short distance beyond. The final 200 feet to the top is more of the same talus.
Section 5: The Summit (Mile 6.0)
The summit is a broad rocky plateau with room for groups. There's no marker building or visitor center; just a small benchmark and a couple of windbreak rock piles built by previous hikers.
Views span:
- Mount Massive and Mount Elbert to the south in the Sawatch
- The Gore Range to the north
- The Holy Cross Ridge sub-peak just south (13,831 ft, often mistaken for Holy Cross itself)
- The Sawatch and Mosquito ranges stretching south
- On clear days, the Front Range to the east
The cross couloir drops from just below the summit on the east face. You can't see the full cross from the top; you have to be looking at the east face from a distance to see it. Bowl of Tears, the alpine lake at the base of the couloir, is visible far below.
Section 6: The Return (Miles 6.0-12.0)
Same route in reverse. The descent down the talus is slow. The drop back into the East Cross Creek drainage is welcome only until you remember what comes next.
Then comes the second climb of Half Moon Pass, 1,000 feet up on tired legs at the end of the day. This is the famous moment when Holy Cross breaks hikers. Pace yourself. Eat. Drink. The pass goes up however many switchbacks it takes.
From the top of Half Moon Pass back to the trailhead is mostly downhill, but the 1.7 miles feels longer than the morning version.
Total descent time is typically 4-5 hours.
Half Moon Pass: The Climb-It-Twice Problem
The defining feature of the Holy Cross route is the pass. Most 14ers have a single sustained climb: you go up, you go down. Holy Cross has three climbs and two descents:
- Climb 1,000 ft up to Half Moon Pass (fresh legs, dawn)
- Drop 1,000 ft to East Cross Creek
- Climb 3,400 ft up to the summit
- Drop 3,400 ft back to East Cross Creek
- Climb 1,000 ft back up to Half Moon Pass (tired legs, afternoon)
- Drop 1,300 ft back to the trailhead
That's the source of the 5,600 ft total elevation gain. The actual mountain is only about 3,400 ft of climbing; Half Moon Pass adds 2,000 ft total (1,000 each way) to the day.
The second climb of Half Moon Pass is the crux of the day for most hikers. It comes after you've already climbed and descended a 14er, your knees are tired, your blood sugar is low, and you're mentally done. The 1,000 feet feels much worse than the same 1,000 feet did in the morning.
Strategy that helps:
- Eat 200-300 calories at East Cross Creek before starting up the pass
- Refill water at the creek
- Pace at a "you could do this all day" speed, not a "let's get this over with" speed
- Use trekking poles. Both of them. Always.
- Mental reframe: the pass is the last work of the day. Once you're over, it's a downhill walk to the car.
Some hikers split the trip into two days, camping at East Cross Creek to skip the second Half Moon Pass climb entirely from a fresh start. The 2-day backpack option is genuinely worth considering for hikers who'd rather hike less per day.
The Cross Couloir
The famous cross-shaped snowfield is a permanent gully on the east face of Holy Cross. The vertical bar is a 1,500-foot couloir descending from just below the summit. The horizontal bar is a band of snow about 1,000 feet across, formed where two side gullies meet the main couloir.
The cross is visible:
- Late May through early July: Best definition. The horizontal arm is well-filled and the cross looks like a proper cross.
- Mid-July through August: The cross degrades as the lower horizontal melts. By late August, in most years, the cross is barely visible.
- September through April: Variable. Heavy fresh snow can re-define the shape, but the classic "cross" look is a spring-to-early-summer phenomenon.
To see the cross from above the route, you have to descend off the summit ridge to the north for a better viewing angle, or hike to Notch Mountain (just east of Holy Cross) for the classic Jackson photograph view. The Notch Mountain shelter at 13,100 ft is the same view William Henry Jackson photographed in 1873. The route is a separate 10-mile round trip from a different trailhead.
Skiing the couloir: The Cross Couloir is a serious ski mountaineering objective. The line is steep (45-50 degrees in the upper section), the approach is long, and the descent commits you to a multi-day trip out of Bowl of Tears. This is not a casual ski. Parties typically attempt it in late May or early June when the snow is consolidated. If you're considering it, you already know what you're doing; this guide is for hikers.
Photography: The classic shot is from Notch Mountain in morning light, ideally late May to mid-June. Bring a real camera with a 70-200mm lens or longer. Phone cameras don't do the scale justice.
What to Pack
The kit is heavier than for an average 14er because the day is longer and the approach has limited bail options:
Water. 3-4 liters minimum. East Cross Creek is the only reliable refill on the route. Carry a filter or treatment tablets if you plan to refill there.
Food. 2,000-2,500 calories of trail food. This is a 9-12 hour day. Real food matters: sandwiches, jerky, energy bars, fruit, electrolyte powder. Plan to eat at East Cross Creek both directions.
Layers. Base + insulation + wind shell + rain shell. The summit is reliably 20-30 degrees colder than the trailhead. The east face wind on the upper ridge can be brutal. See our base layers guide and rain jacket guide.
Sun protection. Sunglasses, sunscreen, hat or visor. The upper talus section reflects light.
Headlamp + spare batteries. Required for alpine starts. See our headlamps guide.
Footwear. Real hiking boots, broken in, with ankle support. The talus punishes trail runners and any flexible-sole shoe. See our hiking boots guide.
Trekking poles. Required, not optional. Both poles. The double-Half Moon Pass climb and the talus descent demand them. See our trekking poles guide.
Map and offline GPS. The cairned route through the upper talus is easy to lose in fog. Pre-download. CalTopo or Gaia GPS work well.
First aid + blister treatment. Multiple bandages, moleskin, tape, ibuprofen, electrolytes.
Bear-aware food storage at camp. If you're camping at the trailhead or at East Cross Creek, bring a bear canister or a proper hang. This is active bear country.
Emergency shelter. A lightweight bivy or emergency blanket. The route has limited bail options between Half Moon Pass and the summit, and an injury on the upper ridge means a long wait for help.
Timing and Weather
Same rule as other 14ers: be off the summit by noon.
Holy Cross is exposed once you're above treeline on the upper ridge, and the descent through the talus is slow. You can't outrun a storm from the summit; you need to be down to the ridge proper by the time storms develop, which typically means starting your descent no later than noon.
Recommended timing for the standard day:
- Trailhead: 3:30-4:00 AM
- Half Moon Pass: 5:00-5:30 AM
- East Cross Creek: 6:00 AM
- Treeline (11,800 ft): 7:30-8:00 AM
- Summit: 10:30-11:30 AM
- East Cross Creek (return): 1:30-2:30 PM
- Half Moon Pass (return): 3:30-4:30 PM
- Trailhead: 4:30-6:00 PM
For a 4 AM trailhead start, you have two reasonable options: drive up the night before and camp at the trailhead, or stay in Minturn, Vail, or Eagle the night before. Driving from Denver in the morning is impractical.
Check forecast.weather.gov for the Holy Cross Wilderness mountain forecast. Holy Cross sits on the western edge of where Front Range monsoon storms develop, and the eastern aspect of the mountain catches storms early. Storms develop here as early as 11 AM in peak monsoon (late July through mid-August).
The mountain also has limited bail options. From the upper ridge, the only escape is back down the way you came. There's no easy alternative descent route, no shelter on the summit, and no cell service for SOS. Storm discipline matters more here than on peaks with multiple route options.
Read our altitude sickness guide before attempting Holy Cross. The combination of long day, big elevation gain, and limited bail options makes altitude problems particularly dangerous.
When to Climb
Best months: Late June through mid-September.
Late May to mid-June: Tigiwon Road is closed to vehicles every year until June 21 for wildlife, so the trailhead is a walk or a bike ride from the gate. Snow on the upper ridge requires microspikes or crampons. The cross couloir is at peak definition. Not ideal for a standard hike.
Late June: Road open in most years. Snow lingering on the upper ridge through late June; check conditions. The cross is still visible. Trailhead camping begins.
July: Peak season. Monsoon starts mid-month. Alpine starts mandatory. The cross is degrading but still visible early in the month.
August: Peak monsoon. Storm-ready by 11 AM most days. The cross is mostly gone. Crowds peak.
September: Best stable weather of the year for Holy Cross. Cooler temperatures, less storm risk, fewer crowds. The aspens in the lower drainage turn gold around the third week of September; combine the climb with a Vail/Minturn aspen viewing weekend.
October: First snow possible at upper elevations. Tigiwon Road closes after the first heavy snowfall, typically mid to late October. After the road closes, the approach adds 8 miles each way.
November through April: Winter conditions. The road is closed; you'd add 8 miles each way to the standard route, plus avalanche risk on the upper ridge. Holy Cross in winter is a serious mountaineering objective, not a hike.
What Makes Holy Cross Different
Holy Cross vs the other major Sawatch 14ers:
The double pass. No other standard 14er route makes you climb a major pass twice. The 5,600 ft of total gain is the second highest in the Sawatch for a single-peak day.
The Wilderness designation. Holy Cross sits entirely within the 122,000-acre Holy Cross Wilderness, established 1980. No mechanized travel, no drone photography, group size limited to 15. The wilderness regulations carry real weight here.
The cultural history. William Henry Jackson's 1873 photograph from Notch Mountain made the cross-shaped snowfield famous nationwide, and the mountain became a pilgrimage site in the early 20th century. It was briefly a National Monument from 1929 to 1950. The religious resonance is part of why the surrounding area was protected.
The cross itself. No other 14er has a permanent feature this iconic. Spring photography pilgrimages still happen every year.
The bail problem. Most 14ers offer at least one alternative descent route or a place to wait out a storm. Holy Cross has neither between Half Moon Pass and the summit. Storm discipline is more important here than on peaks like Bierstadt or Grays where you have options.
Lower trailhead than most Sawatch 14ers. 10,320 ft vs 10,000-10,700 ft for Elbert/Massive/Harvard. Comparable, slightly lower, but the route's elevation gain is higher.
Best Sawatch wilderness aesthetic. Less developed than the Elbert/Massive area. Trail is rougher, more remote feeling, fewer signs, no parking lot bathrooms beyond the pit toilet. This is intentional. It's wilderness.
Holy Cross is appropriate as a third or fourth 14er, after Bierstadt, Quandary or Grays, and ideally Mount Elbert. The 5,600 ft of gain and the talus class-2 work make this not a first 14er.
Common Mistakes
Underestimating Half Moon Pass. Hikers see "12 miles, 5,600 ft" and assume it's a slightly bigger Elbert. The two climbs of the pass make it harder than that number suggests.
Not eating at East Cross Creek both directions. Skipping fuel at the creek going up and the creek coming back leads to a bonk on the second pass climb. Eat at the creek both ways. Set a timer if you have to.
Wrong footwear. Trail runners or flexible boots fail on the upper talus. Real hiking boots, broken in.
Not enough water. 3-4 liters minimum. Refill at East Cross Creek both directions if you can.
Starting too late. A 5 AM start is too late for this route. Monsoon storms develop early on the east face. 3:30-4:00 AM is the minimum.
Trying to drive from Denver in the morning. The road is 2 hours, then 8 miles of gravel, then a long day on foot. Sleep at the trailhead or in Minturn.
Skipping trekking poles. The double-Half Moon Pass climb and the talus descent are brutal without poles. Both poles. Every section of descent.
Underestimating bail risk. Holy Cross has limited escape options from the upper ridge. If a storm builds, you have to be off the talus and below treeline before it hits. This requires earlier turnaround discipline than peaks with multiple descent routes.
Forgetting bear precautions at camp. Tigiwon Road and East Cross Creek have active bears. Hang your food or use a canister. Don't sleep with food in your tent.
Confusing Holy Cross Ridge with Holy Cross. The sub-peak Holy Cross Ridge (13,831 ft) sits just south of the true summit and is sometimes mistaken from below. The route doesn't go to it. Stay on the cairned line to the true summit.
Other 14ers to Consider
After Mount of the Holy Cross:
- Mount Elbert: The state's highest peak, lower technical difficulty. See our Mount Elbert guide.
- Mount Massive: Right next to Elbert, similar length day. See our Mount Massive guide.
- Mount Harvard: Collegiate Peaks classic, comparable distance to Holy Cross. See our Mount Harvard guide.
- Grays Peak and Torreys Peak: Front Range double, easier introduction. See our Grays Peak guide.
- Quandary Peak: Shorter Tenmile single peak. See our Quandary Peak guide.
- Mount Bierstadt: The starter 14er, closest to Denver. See our Mount Bierstadt guide.
- Pikes Peak by Barr Trail: The endurance challenge. See our Pikes Peak guide.
For the full ranking, see our easiest 14ers guide.
Final Thoughts
Mount of the Holy Cross is one of the most demanding "easy" 14ers in Colorado. The Class 2 talus is manageable, but the 12-mile day with 5,600 feet of gain (including the notorious double climb of Half Moon Pass) makes it harder than its technical class suggests. It's the right 14er for hikers who've already done Bierstadt, Quandary, or Grays, who are training for the 13ers or the harder Sawatch peaks, and who want to see one of the most culturally significant mountains in Colorado history up close.
The keys to a successful Holy Cross day: sleep at the trailhead or in Minturn, alpine start by 4 AM at the latest, eat real food at East Cross Creek both directions, pace for the second pass climb, watch the weather like your life depends on it (because on the upper ridge, it does), and use both trekking poles every step of the descent.
If you can climb Holy Cross in a single day with good weather and finish without breaking yourself, you've earned a real Colorado mountain. The cross couloir, visible above the dark face on the way out, is a reminder of why this mountain has held its place in the state's imagination for 150 years.
For the trail stats and map: Mount of the Holy Cross trail page. For the full gear kit, see our guides to hiking boots, rain jackets, base layers, headlamps, and trekking poles. And read our altitude sickness guide before any 14er attempt.
Get the Colorado 14er Packing Checklist (free PDF)
Plus a weekly note on the best Colorado trails, gear deals, and seasonal hike picks. No spam, unsubscribe anytime.
We respect your inbox. Unsubscribe anytime.